Sunday, July 1, 2012

Bedding Set for a Doll


My daughter Hannah and I went to a new quilt shop in town.  They have a ton of fabric to choose from and Hannah was drawn to the shelf full of fat quarters.  I told her she could pick two and we would come up with something to make, but she couldn't decide on just two.  I told her she could have three if she told me what she wanted to make with them.  She said she wanted to make a bedding set for Rosalina - her "American Girl" doll.  (Don't tell her, but it isn't really AG.  It came from Target and it was about a third the price of a real one.)  It's a deal!  I'll give it my best shot.

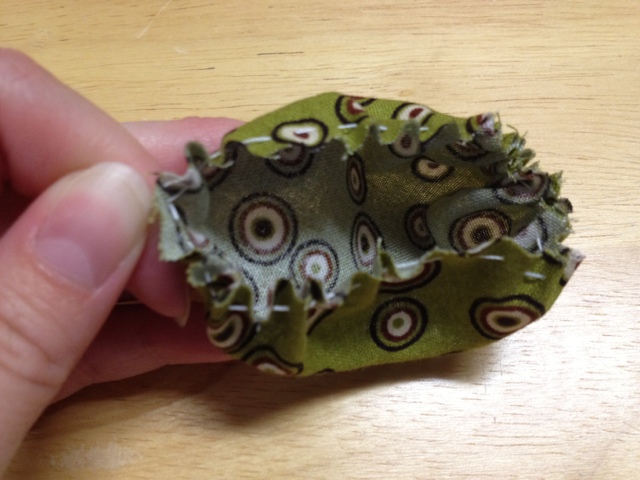
First up was the pillow.  Hannah chose the blue fabric for this and she requested ruffles.  This is what I came up with.  I gave her the job stuffing the pillow after it was sewn, while I moved on to the fitted sheet.

She wanted the gold (looks brown in the photos) fabric for the fitted sheet.  I boxed off the corners and then hemmed all the way around the edge.  I ran a narrow elastic through the hem.  And that's all there was to it.  The mattress is a small, rectangular pillow.

And now for the blanket.  Hannah saved the purple fabric for this.  I had a small section of the blue leftover after the pillow, so I sewed that across the top.  I cut a piece of white fleece the same size as the blue and purple fabric.  Then I put the right sides together and sewed almost all the way around the edge, leaving a small gap for turning it right side out.  I trimmed the edges, clipped the corners, and turned it, making sure to get as crisp of corners as possible.  Then I topstitched all the way around the top, near the edge.  And done.


Now Rosalina can nap in style!
Rosalina wearing an outfit I made for Hannah's birthday

Once again, things turned out better than I expected, so I didn't take in-progress photos, not anticipating a post about it.  If you have questions about any of it, leave a comment and I will try to answer.  Enjoy!

Sunday, June 24, 2012

Plastic Cap Pincushion


I don't know why, but I have been keeping the plastic lids that are on the milk bottles that come with my children's kid's meals at fast food restaurants.  I had no project in mind, they just seemed like they might come in handy for something.

Well, after collecting four more caps this weekend, I decided to do a little Pinterest searching to see what the rest of the world is doing with their plastic caps.

I found several ideas that I pinned, including these two that holds lots of promise - this one and this one.  But the one I decided to start with is this tiny pincushion.  I fully intended to make it just like the ones in her pictures, but I didn't like any of the ribbon that I have (and it is after 9pm on a Sunday, so I am not headed out to buy more).  I found some fabric that would match the brown lid that came off my daughter's chocolate milk at some point and pulled together the rest of the very few supplies I needed for this project.


Supplies needed:
-Plastic lid (mine is from a chocolate milk bottle from a fast food kid's meal)
-Small circle of fabric
-Batting (not as much as in the photo)
-Needle
-Thread
-Glue
-Scissors

Optional and not shown in this tutorial:
-coordinating ribbon to glue onto the outside of the plastic cap
-felt to go on the bottom (I couldn't find any in the chaos of my "craft room")

Step 1 - Cut the fabric.

Cut the fabric circle larger than the bottle cap.  You can see the proportions I used in the photo.  The bigger the fabric circle, the more cushion that will stick up from the cap.  Adjust yours accordingly.


Step 2 - Sew the fabric circle into a cushion.
Using the needle and thread, sew a simple running stitch just in from the edge of the fabric.
When you get back to the beginning, pull it together a bit to form a little pouch you can start to stuff.


Step 3 - Stuff
Put a pinch of stuffing into the fabric pouch.  Keep adding more while pulling the thread tails tighter from both ends.

Once you have it stuffed tight, pull both thread ends as tight as you can and tie them together in a knot.  

Before moving on to the next step stuff your little cushion into your lid to make sure you like how it looks.  If there are problems, now is the time to adjust.  If it is good, move on to Step 4.


Step 4 - Glue

Get your glue and put a nice coating on the inside of the lid.  Make sure you get some on the sides and bottom.


Step 5 - Cram and finish

Now, take the little fabric cushion and cram it open-end-first into the gluey lid.  Tuck it in nice and even.  And that's it!  


Optional steps (that I did not take, but might next time)

-The blog I found this on, put ribbon around the edge of the cap to cover the plastic.  I was planning to do this, but didn't like my ribbon choices.

-You could also cut a circle of felt the same size as the cap and glue that on the bottom.  I was going to do this too, but couldn't find anything other than pink felt in the chaos of my "craft room".  I could always add that later.  Or next time.


Now, put a bunch of pins or needles in it.  Enjoy!


Monday, May 28, 2012

Quilt + Pillow = Quillow


It's a quilt. It's a pillow. It's a Quillow ... and it's finally done!


I had one of these made for me when I was a child.  I used to enjoy cuddling up on my bed or the couch with my feet tucked warmly in the pocket.  I loved it, so I decided to try to make one for my daughter.


I am not going to teach you how to make a quilt. If you don't know how, ask someone who is a better quilter than me. I've kinda made it up as I went along.


This quilt is three different fabrics. 
I cut dozens of 4 1/2" squares and sewed them all together into the quilt top. I made the back with two large panels of each of the three colors. I put some batting in the middle and machine-quilted between each square.


Now I know I don't use a proper border technique, but I don't care. I cut long two inch wide strips and folded it in on itself and sewed it around the edges of the quilt after trimming it.


So that would have been the end of it if I was just making a quilt, but I wanted to turn this into quillow. I made two four-square by four-square panels and added some batting and quilted and edged them the same way as I did the quilt. Next up was sewing that panel to the bottom center of the back of the quilt. I sewed it around the right, bottom, and left sides of the panel, leaving the top open. Sew it on good. It is going to get used and abused.


All done sewing! To turn it into a pillow, fold the sides in even with right and left sides of the pillow panels. 

It should be about in thirds. Then, fold the top of the quilt towards the top of the panel, stop a few inches before the panel. Fold that in half. 
Turn the pillow section inside out and tuck the folded quilt into the pillow. And now you have a pillow.


You could add any fabric to any quilt or blanket that you already have, as long as the proportions are right.


Enjoy!


Demonstrating the "foot warmer" feature


Monday, May 21, 2012

Giant Chocolate Donut Cake

This was much easier than it looks and turned out much better than I expected. It wasn't until I saw the finished product that I decided it was post-worthy and then it was too late for in-process photos. Maybe I'll have to make another one and take more pictures.


The key to the whole thing is the pan. My husband bought it for me for Christmas. He got it at Big Lots for $5 apparently, but I am guessing you can get them online or in other stores.


It is silicone, there are two identical pan pieces, one for the top half, one for the bottom.


I preheated the oven as directed on the box cake mix. I prepared the batter according to the box directions. Then spray the pans thoroughly with Baker's Joy to ensure easy cake removal. Divide the batter evenly between the two pans. Mine have max fill lines inside them.


The instructions that came with the pans gave recommended bake time, I think it was about 30 minutes. You can do the toothpick test to check. Let them cool in the pans for a bit then cool completely on a rack.


Flip them back over and use a cake leveler to get a nice even surface on each. I used standard store-bought icing to put a layer across the cut surface of the bottom cake. Then carefully flip the other cake over on top of the first, being careful not to break the cake and line up the edges as best you can.


Next step is icing. I scooped more out of the same container as before and put it in a microwaveable bowl. I warmed it up for 10-15 seconds - enough to make it soft, but not too runny. (If you make it too runny, like I did the first time, add another spoonful of room temp icing and stir.) Pour the warm icing over the top of the donut/cake and let it drizzle down the sides a bit. Once you've got the icing good, top with chocolate sprinkles.


Serve to a delighted birthday boy (or whoever you feel is deserving of a delicious cake, maybe even yourself).


Of course, you can make any combination of cake flavor and icing and decorations you want. You could even hollow out a "trough" and put a filling in before putting the top cake on.


Enjoy! And let me know how it goes.

Thursday, April 19, 2012

Key Sweaters


I found this idea on Pinterest and fell in love. Not only do I have a fondness for sweaters, but I adore all things tiny.


However, the original pin was just a photo, not a pattern. My friend Tamra also loved the key sweater and said she would find me a pattern if I agreed to knit one (or ten) for her. Deal!


She found this blog for me that had a pattern for Cozy Keys and I was off and running ... err, knitting.


My first attempt turned out the wrong size and shape, so I made a few modifications.
My son wearing my first attempt - I just added a face and hair.
My version goes something like this:
CO 12 sts, distribute evenly on 3 DPNs (size 0) and begin working in the round.
Row 1:  K2, kfb, repeat around
Row 2-3:  Knit
Row 4:  K6, kfb, kfb, repeat
Row 5:  Knit
Row 6:  K8, kfb, kfb, repeat

Row 7:  Knit
Row 8:  K10, kfb, kfb, repeat (28 sts)
Row 9:  K2, P2, K2, P2, slip 6 to cable needle, repeat
Row 10-12:  K2, P2, repeat around
Bind off.


Sleeves (same process for both):
K6 from cable needle in the round
Knit 6 sts for 4 rows.
Bind off.


Now my desk key is nice and warm in my cold office and Tamra was repaid with these cuties.


I made the one in the top picture with some fun shiny yarn that is sport weight.

Enjoy making yours!  I would love to see them.  Come back when you are finished and post a link to a photo of yours.

Tuesday, April 17, 2012

Earbud Cord Wrap


I whipped this up (okay, knitted) one night when I decided I needed something to control the cord on my earbuds.


The yarn I chose was a sport weight (2 Fine) by Lion Brand that had some sparkle to it. I used size 2 or 3 needles.


I cast on 24 stitches loosely. I knit about 12 rows in a 2x2 rib (knit two stitches, purl two stitches, repeat across). Bind off loosely in rib pattern. Weave in loose ends.
You could use other yarn or other needles or a different stitch pattern. This is just what I did and it worked for me. I chose the rib to make it have an elastic quality.
My finished product was about 1 1/4" by 2 1/2".


Then I took some thin black elastic about 5 1/2" long and folded it in half. You might want to tie a knot at the very end to hold the two cut ends together. Sew that to one end of the knitted piece so that it lays across the whole piece. Sew it on securely so that it doesn't come off when you pull on it. This I where that knot might come in handy.


See a button on top of the end of the elastic. I used a 3/4" button. Use any size you want. It just has to be big enough to hold your elastic.


And now it is time to wrap up your unruly cord. I wrap mine around my fingers, then wrap the knit wrap around that.


I hope it works for you. Enjoy!

Thursday, April 12, 2012

Rapunzel Cake


Before you even look at the photo, I need to offer a disclaimer...I am not an artist.  I am not a sculpter.  I just enjoy making things.  

My daughter LOVES the Disney movie Tangled and everything Rapunzel.  If you haven't seen the movie, stop reading now and go rent or buy the movie and watch it.  It is really good.

I made three cakes, iced them, and stacked them up.  Round, square, round, decreasing in size.  The cakes were box mixes and the icing was store bought, too.

Now here is where the hard part starts.  I made Candy Clay in various colors using Wilton Candy Melts.  That recipe is for a whole bag of candy melts, but you can scale it down.  My calculations have it at 10 candy melts per 1 teaspoon of corn syrup.  I used the clay to make a (not-very-pretty) Rapunzel, Pascal the chameleon, a frying pan, a hair brush, my version of the sun symbol, lots of flowers and leaves, and then a Rapunzel-supply of hair.  I wrapped the "hair" around all the layers of the cake and then used my super-rusty cursive-writing skills to spell Hannah's name across the front of the cake.  (The "6" is the candle, not edible.)

I was a little disappointed in my Rapunzel-sculpting skills, but other than that, I love how it turned out.  And most importantly, my daughter thought it was the most awesome cake ever.