"Frozen" is the biggest movie on the planet currently, right? So, of course, my daughter requests a "Frozen"-themed birthday party and cake. Here is the finished cake...
She chose two different flavors of boxed cake mix (because I have yet to attempt baking a cake from scratch) - blue velvet and pink lemonade. I baked them according to package directions, leveled them, stacked them, and crumb-coated them in store-bought icing.
Somewhere along the line, I decided this cake would be the perfect opportunity to finally try using fondant, and homemade fondant at that. I followed the instructions for Homemade Fondant found on Johanna's blog My Crazy Blessed Life. It was easy to make - just marshmallows, powdered sugar, and water. I added a bit of blue gel food coloring at the end and kneaded it in to make a marbled effect. However, after I rolled it out nice and thin and got ready to pick it up to gracefully drape over the cake, it was hard-core stuck to the counter. So I had to knead it some more before rolling again (with way more powdered sugar on the counter this time) and my marbling was gone. I did the bottom tier by itself first, then did the top, and then stacked them. I covered the rough edges with a fondant rope. The ice/snow steps in front were blocks of fondant and a fondant rope railing held in place at the top and bottom with a cut toothpick.

Now for the other decorations... I made the trees out of candy clay. I've been using candy clay for quite a while for edible cake decorations. The recipe on Wilton's site has you use an entire bag of Candy Melts. That makes a ton of candy clay and I never need that much. So, a while back, I did the math to scale down the recipe. If you want a smaller amount, use one teaspoon of corn syrup for every ten candy melt discs. (This only applies to Wilton brand Candy Melts. Other brands may have different sized pieces.) The instructions Wilton provides are easy to follow - but basically, it is melt the candy melts (I use microwave method), then stir in the corn syrup, then spread out on a plate or wax paper and let it cool overnight. When you are ready to use it, you knead it a little at a time to soften it up and you are ready to go.

I shaped the prepared candy clay into a cone shape and then stuck a lollipop stick in. I used kitchen scissors to make small snips all the way around. When done, I stuck them into the cake evenly around the bottom layer.

Next up, I needed some Anna and Elsa and Olaf to actually make this look "Frozen" and to meet the approval of my daughter. This is where things got surprisingly complicated.
I planned to just go to Target or Wal-Mart and buy small Anna and Elsa toys to put on the cake like in the inspiration photo. Not so easy. I went to every store I could think of and couldn't find Elsa. I found Anna at a few stores, but the cheapest small Elsa I could find was included in a larger playset and cost around $40. I love my daughter, but I am not spending that much on a cake topper. Sorry. I explored every option I could think of and settled on printing my own Shrinky Dinks. If you are not familiar with Shrinky Dinks, immediately stop reading this and go Google it and then buy some and have hours of fun. Just come back and finish reading this blog post eventually.
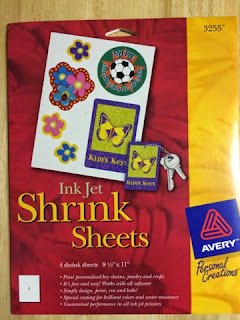
So, anyway, I found these printable "shrink sheets" forever ago and tucked them away.
It looks like Avery maybe discontinued the product, but this product on Amazon looks like it might work. I found the images for Anna, Elsa, and Olaf on Google Images. I used Photoshop to get them all on one sheet of plastic and faded the color quite a bit. (You will want to experiment with this if the instructions don't give you specifics. If you leave the image full color, it will be really dark after you bake/shrink it.) I flipped the image and printed on the back also. Then I carefully cut out the characters leaving a spike at the bottom of each one under the feet. I baked them and stabbed them into the cake.
 |
| Shrinky Dink Elsa and Anna |
And since my daughter wanted an "8" candle, I stuck a toothpick into the bottom of the candle for extra support and cut out a small spot of fondant for the base and placed the candle.
 |
| Elsa, Anna, Olaf, and a giant 8 candle |
And with a finished cake, I had a very happy birthday girl.

The End. And we all lived happily ever after. Right? Well, mostly. Just one thing I wanted to point out. This fondant is rather heavy. Everything worked out just fine, but you may be able to see the fondant on the bottom cake layer buckling a bit. Next time, I think I need to make a change or two to prevent this.
Some options:
-roll the fondant thinner, thereby using less
-use a denser cake (at least for the bottom) to better support the weight
-put some sort of support system in the bottom cake, dowels to hold up a base for the top cake, maybe.
I think I was the only one that noticed it (and then pointed it out to everyone) and the cake didn't collapse or anything, so it all worked out, but just a word of warning...
Thanks for stopping by!


